GTA 6 Beginner Tips
The GTA 6 beginner tips that matter in your first hours: mailbox payouts, heat and vehicle descriptions, BuckMe, your free car registration and the Slim Jim.
Skip to the guideDisclosure: As an Amazon Associate I earn from qualifying purchases. Buying through our links costs you nothing extra. How we pick products.
GTA 6 explains a lot through on-screen hints, but several of its new systems are easy to miss in the first few hours. These tips cover the Prologue and the first two chapters. Each one links to the mission where the system first appears, so you can see it in context.
Money and your home
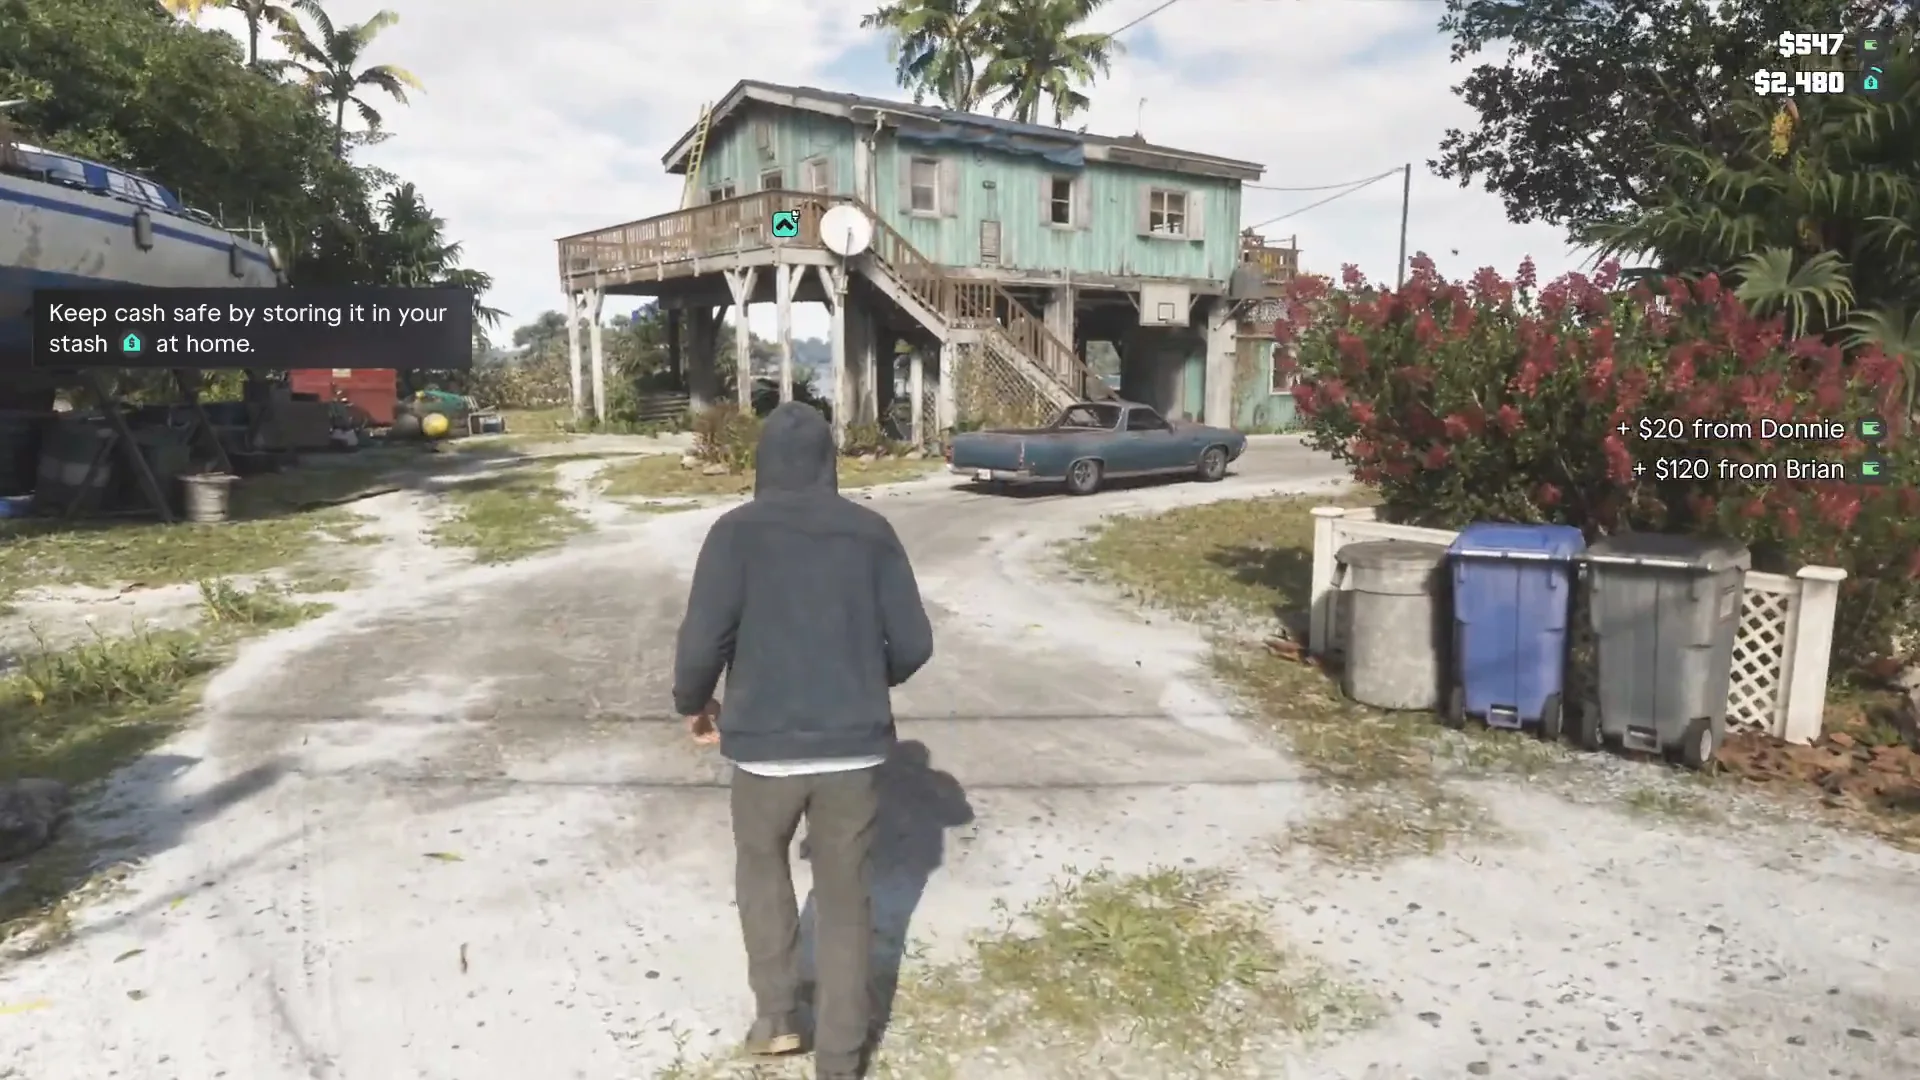
1. Check the mailbox after every job
Payouts from Brian and Cal don’t go straight into your pocket. They’re left in the mailbox at Jason’s house. After Gone Fishing you’ll find $20 from Donnie and $120 from Brian waiting there. Get into the habit of swinging by the house between jobs, or you’ll wonder why you’re broke.
2. Keep cash in your stash, not your pocket
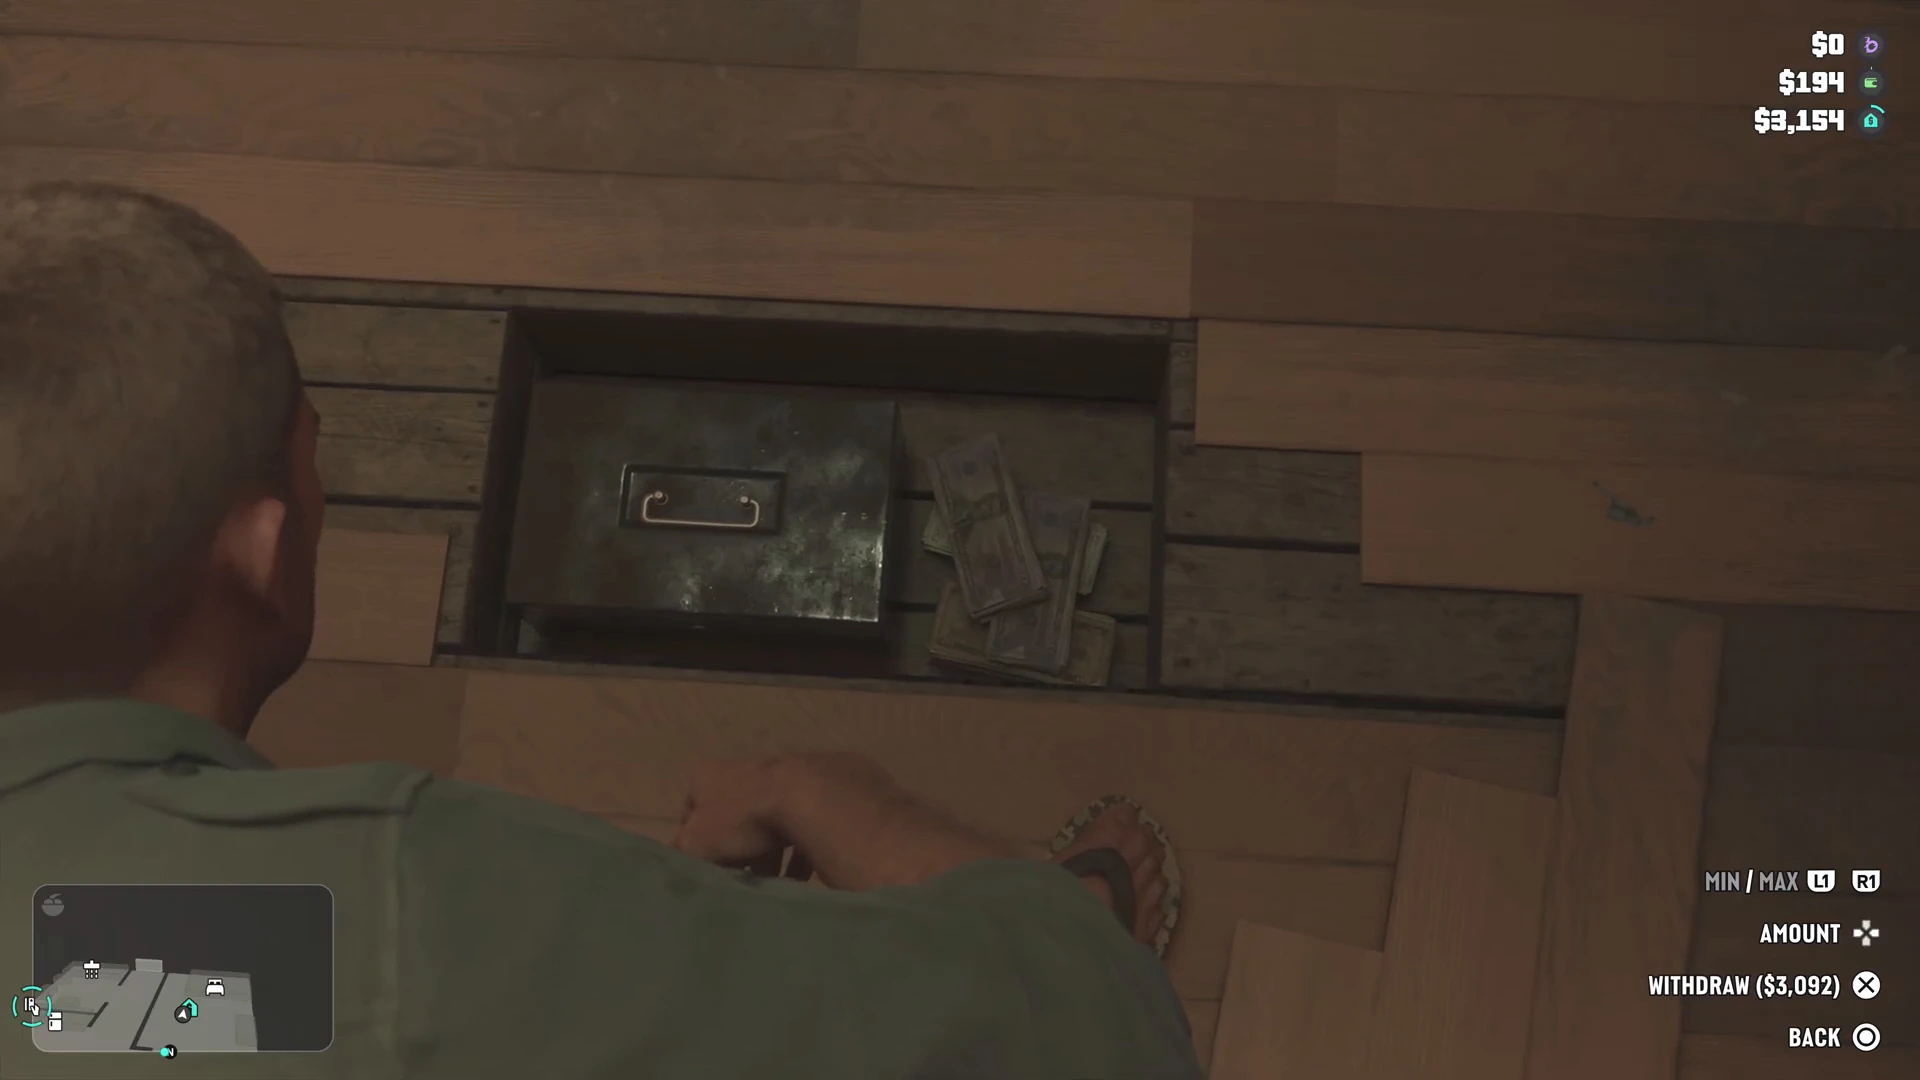
Jason has a hidden stash under the bedroom floor. The game suggests keeping cash there so it’s safe. Money you carry is the money you can lose, so drop off big payouts before you go looking for trouble.
3. Set up BuckMe as soon as you can
Jason doesn’t have a bank account, and some items need one. The Mahi Nipper .38 at Ammu-Nation, for example, requires a bank account to buy. Buck Me fixes that. It gives you a $100 welcome bonus and lets you deposit cash at any ATM. The Family Savings account earns interest, and the first goal is $5,000.
4. Search every room for cash
Missions hide loose cash in their side rooms. In Lab Fees the shelves in the lab are worth far more than the till out front. In Don Gone you can take a $1,200 stash bag from Donnie’s trailer. If a room has shelves and drawers, check them.
5. Don’t rush Gear Up
Gear Up sits on your map as “Pick Up Another Gun” until you can afford a longarm. Do Lab Fees and Unwanted Attention first, since both pay out in cash, and come back once you have enough.
The police, heat and wanted levels
6. Losing the stars isn’t the end of it
From the Prologue onwards, GTA 6 remembers what you were seen driving. After a chase you get “You lost the cops, but they’re still looking for you and have your vehicle description.” Swap cars, or take yours to a Pay ‘n’ Spray, which Unwanted Attention unlocks. A respray means the cops no longer recognize it.
7. Your outfit has heat too
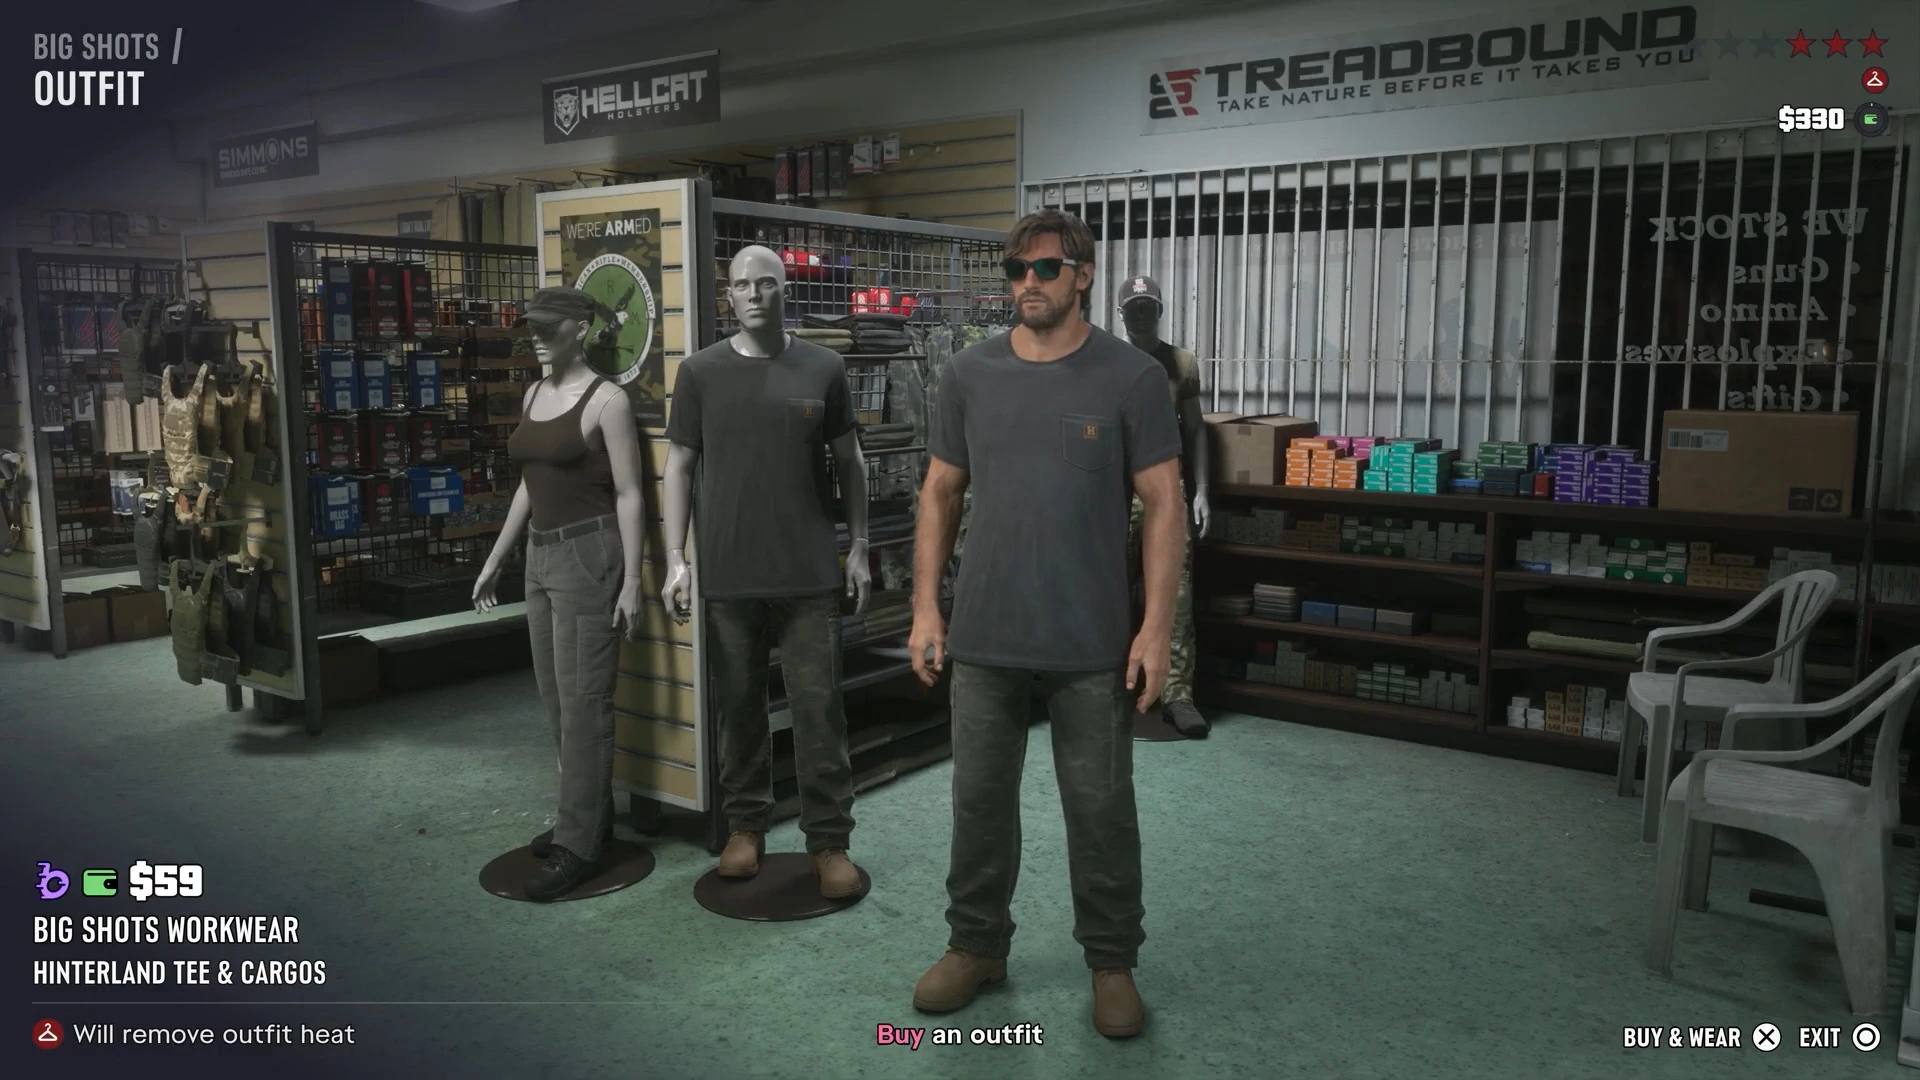
The police also remember what you look like. Changing your hat, glasses or hairstyle lowers recognition, and buying a new outfit removes outfit heat. Jason can buy clothes at the gun store, and you can save outfits in your wardrobe and keep a spare set in your car’s trunk.
8. Break line of sight to lose the cops
When you get “Lose the cops,” get out of the red search area on the map and stay out of view. Side streets, alleys, tunnels and water all help. In Home Sweet Home sneaking through back yards works better than running down the street, and in Tourist Trap reaching open water clears a four-star wanted level.
9. Wait for “Heat cleared” before you arrive
Some mission starts need you to be clean. In Moses the cutscene only plays once the Heat cleared message appears. If a mission won’t start, check for leftover heat.
10. Install the cop scanner
Cal adds a cop scanner to Jason’s phone in Unwanted Attention. It lets you listen to police radio and get alerts about dispatch areas, which is a big help when you’re planning an escape.
11. Your criminal profile is watching
Hints in several missions mention your criminal profile. Clean jobs with limited aggression count toward a professional profile. Disabling a police car without casualties counts toward a hardened one, and a feed on the right logs your takedowns as lethal or not. How much the profile matters long term isn’t fully clear yet, so play the way you like, but know the game is tracking it.
Cars and weapons
12. Use your free registration on a car you like
Your first personal vehicle registration with Moses is free. Every registration after that costs the amount on the car’s info card, which can run into thousands. Pick something you’ll want to keep driving. See the Moses walkthrough.
13. Read a car’s info card before you steal it
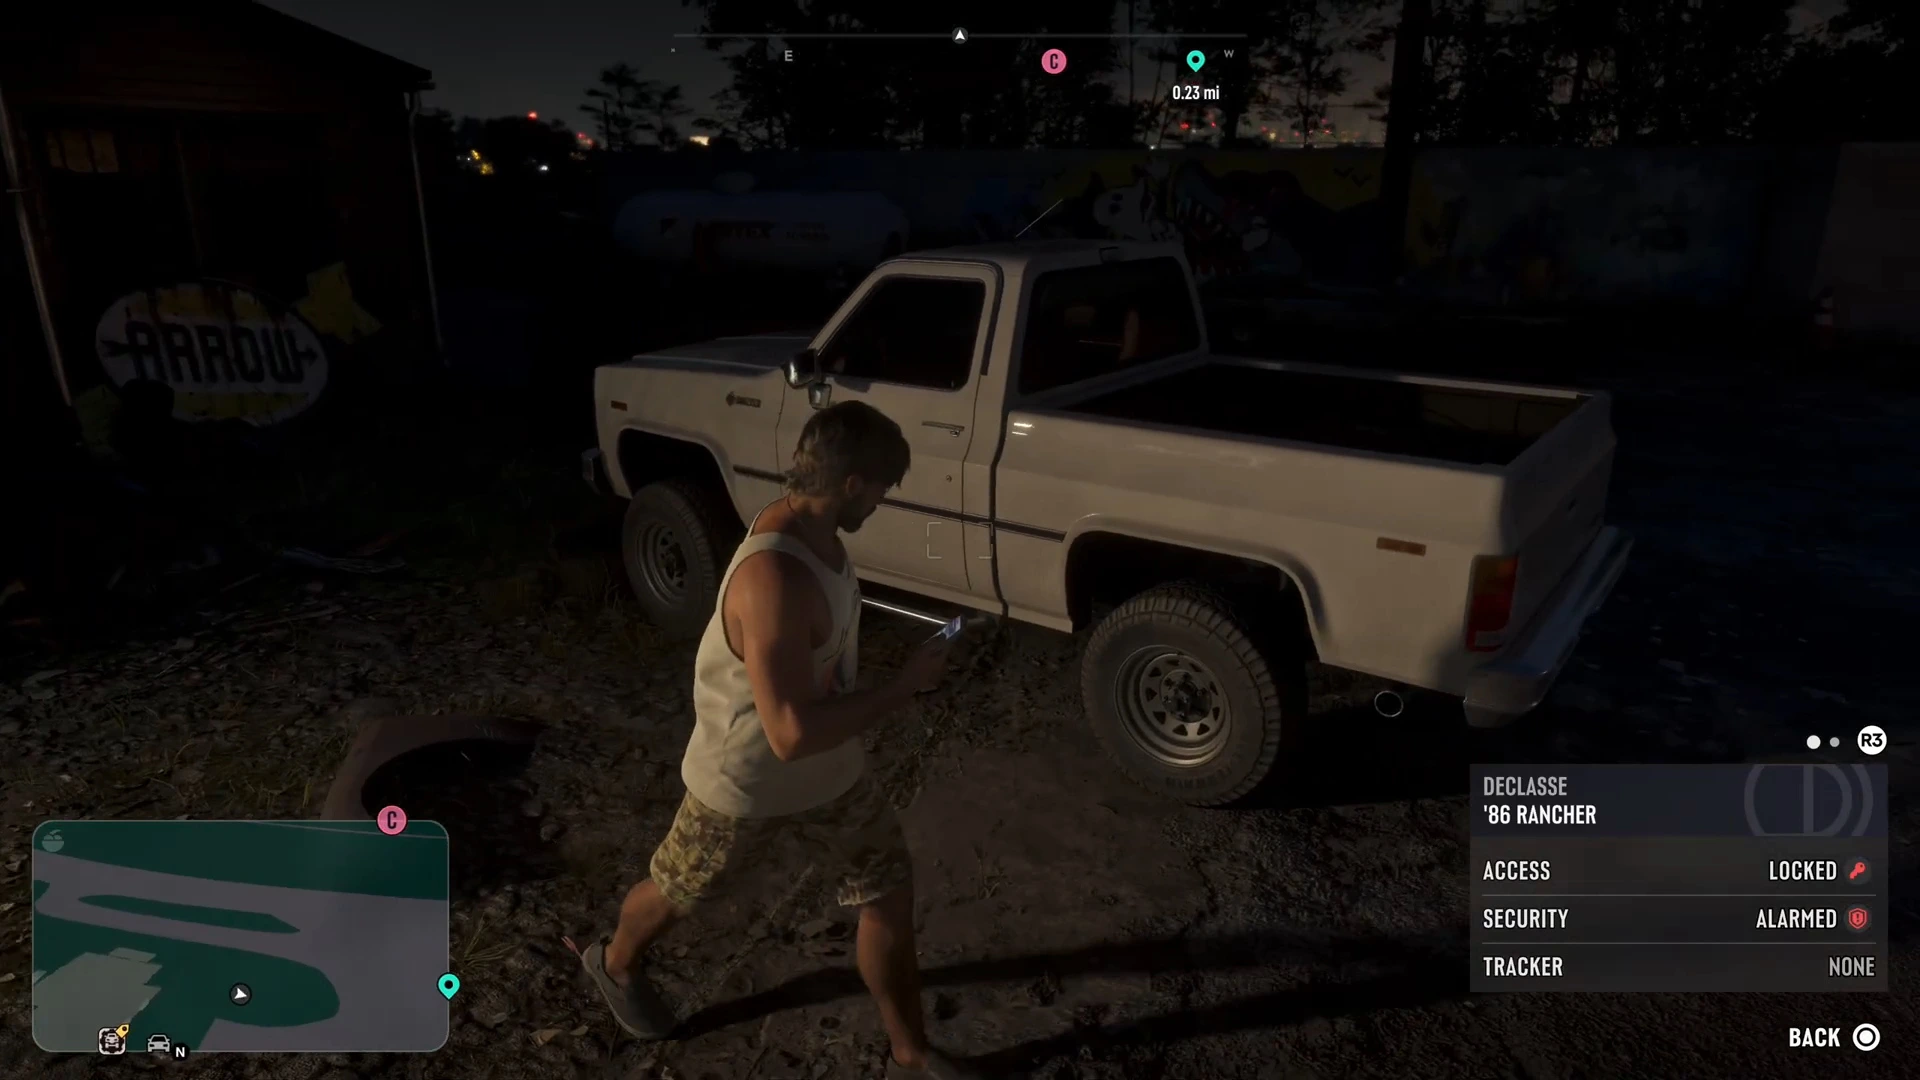
Aim at a parked car to see its access, security, tracker, sell value and cost to register. Moses buys untracked cars, so a car with no tracker and a decent sell value is quick money.
14. Use the Slim Jim on alarmed cars
Moses gives Lucia a Slim Jim. Using it to break into a car lets you avoid setting off the alarm. Line up the circular meter and the lock pops quietly.
15. Don’t walk around with a rifle out
The game warns that openly carrying a weapon can be dangerous. Store guns in a weapon locker or your vehicle’s trunk, and carry a pistol when you’re on foot. Bags can go in any trunk too.
16. Ammu-Nation stocks more as you buy
Buying weapons expands what each Ammu-Nation sells. If the shelves look thin early on, it’s because you haven’t bought much yet.
17. Bring a gun to “simple” jobs
Plenty of missions turn into gunfights without handing you a weapon. Hey Arnold!, Girls’ Trip and Slam Dunk all go better if you arrive armed. Loot downed enemies for ammo and better guns, such as the W-14 Rifle in Gone Fishing or the Duke 556 in Swamped.
Combat and missions
18. Use focus
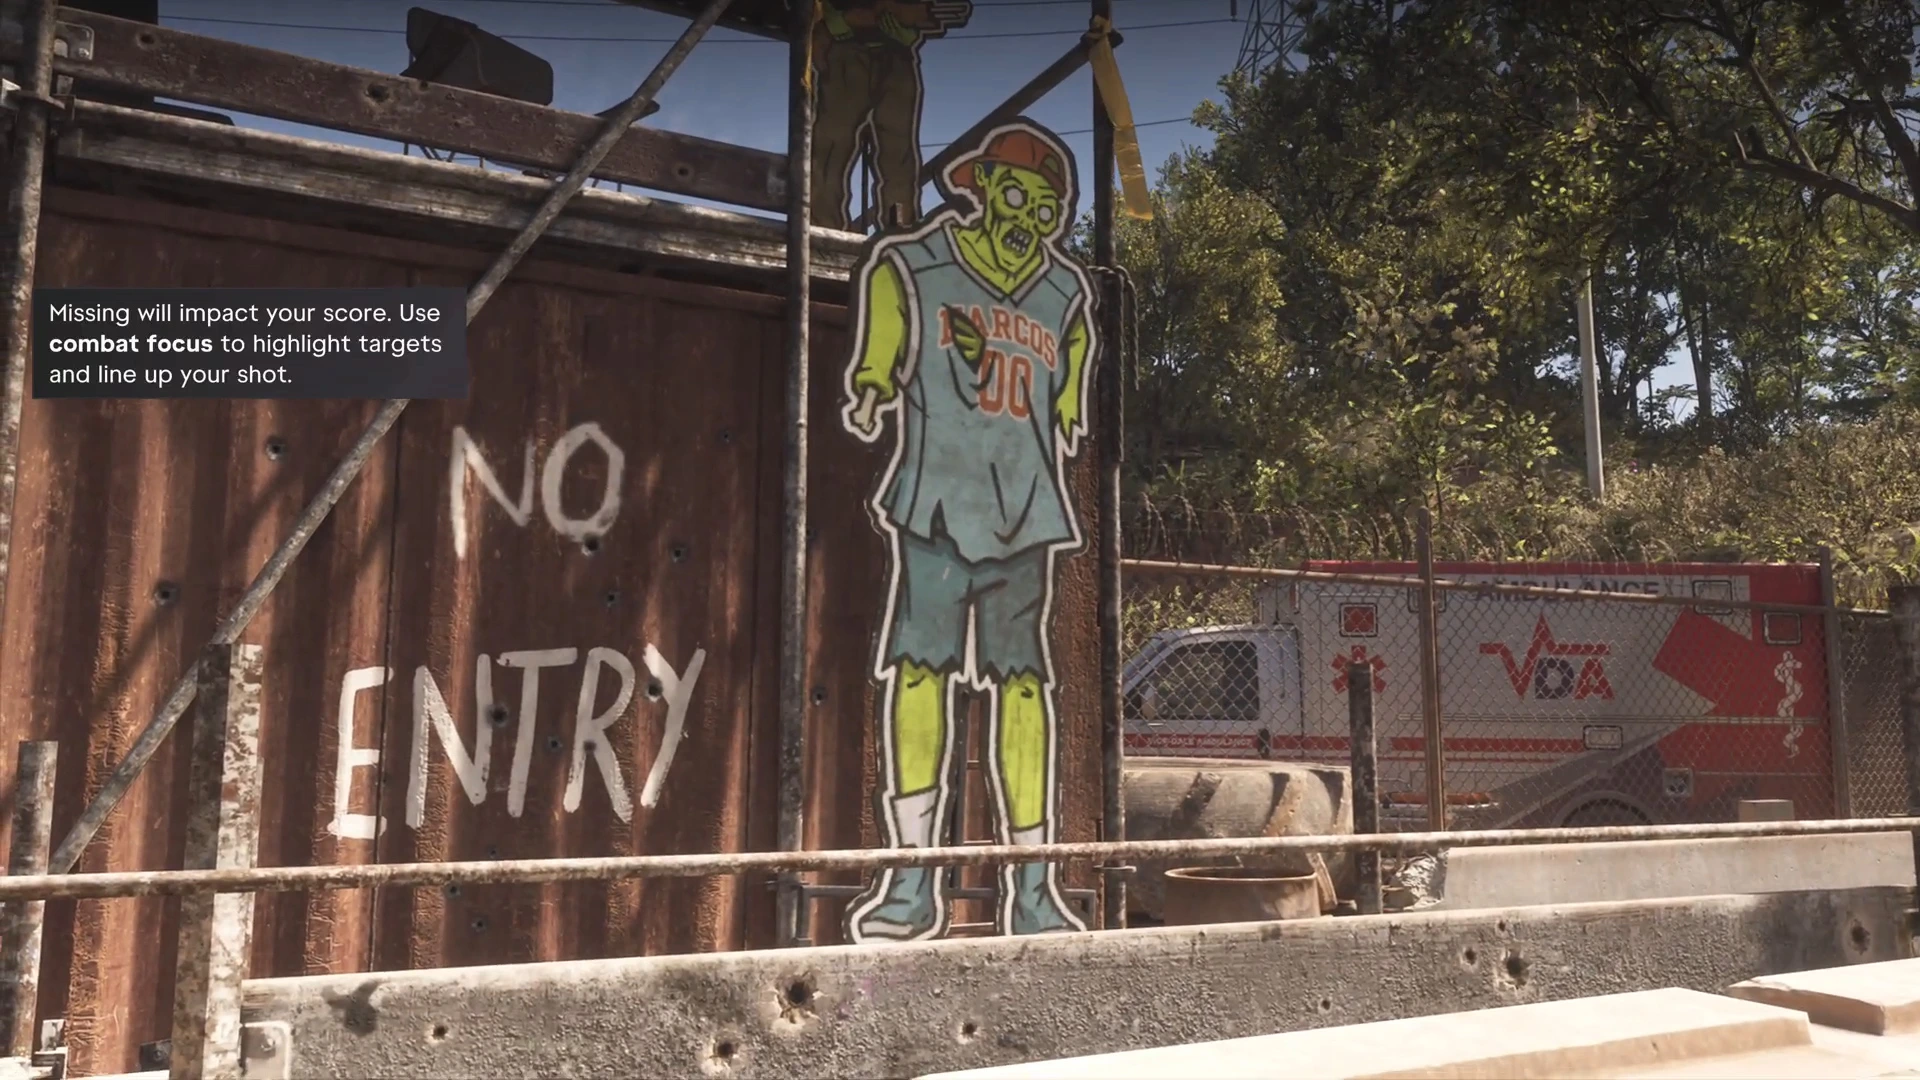
Combat focus slows time while you aim and highlights vulnerable areas on vehicles. It’s what makes the champagne bottle shooting in Day Release easy and the ambulance chase in Discharge Time manageable.
19. Heal with your items
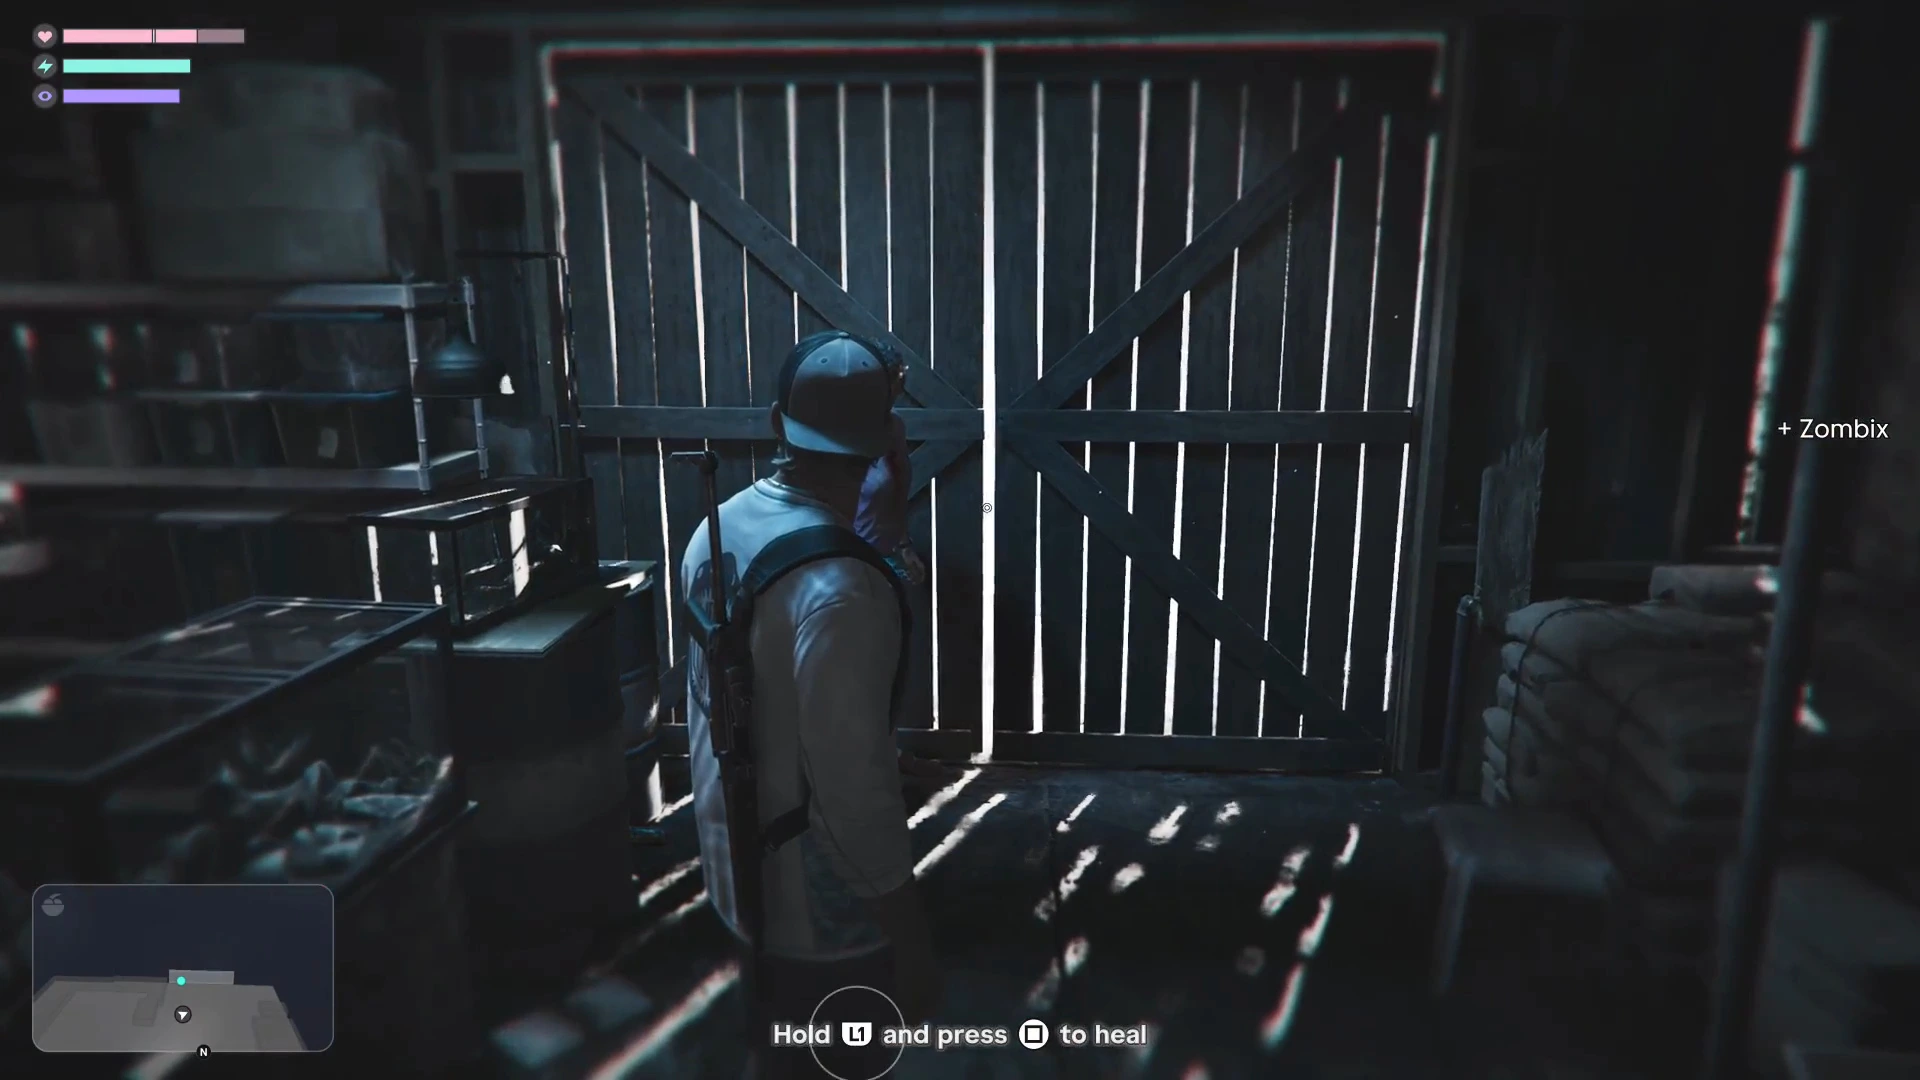
Donnie hands you Zombix in Gone Fishing, and the game shows you how to hold one button and press another to heal. Use it between waves instead of hiding until your health comes back.
20. There’s no mission replay, but there are checkpoints
GTA 6 has no mission replay and no gold medals, so you don’t need to chase grades. If a mission goes wrong, the pause menu has Retry Checkpoint and Restart Mission. Missables are rare, but optional cash such as the trailer in Gone Fishing can be skipped by accident, so read ahead in each walkthrough.
A couple of upgrades worth having
You don’t need new gear to enjoy GTA 6, but two things help in the first hours. A controller with spare buttons or good triggers helps with driving and shooting at once, and a headset makes it easier to hear police radio and the directional sound cues used when searching for items. In Find Donnie’s Package you follow a beeping noise to find the package.
DualSense Wireless Controller (Midnight Black)
A spare DualSense means one charges while you play. GTA 6 supports the DualSense's haptics and adaptive triggers on PS5.
Check price on AmazonSony Pulse Elite Wireless Headset
Sony's own wireless headset with PS5 3D Audio support, which helps you pick out where sirens and sound cues are coming from.
Check price on AmazonFor more options, see the best controller for GTA 6 and best headset for GTA 6 guides.
Where to start
Begin with the Prologue walkthrough, then follow the full mission list in order. If you haven’t installed the game yet, our preload and download guide has everything you need.
More GTA 6 guides
- GTA 6 FAQ
- How to preload and download GTA 6
- GTA 6 price by edition and region
- GTA 6 Standard vs Ultimate Edition
- Buck Me walkthrough
- Moses walkthrough
- Full GTA 6 mission list
- GTA 6 weather and time of day
- What happens when you fail a mission in GTA 6
- How to fix the railing in GTA 6