GTA 6 Beginner's Guide: Everything to Know Before You Start
The GTA 6 beginner's guide to every core system: controls, HUD, phone, map, switching characters, cash vs BuckMe, saving, heat, cars and what to skip.
Skip to the guideWho this is for: players in the Prologue or Chapter 1 who want to understand how GTA 6 works before they get too far in.
GTA 6 runs on a handful of systems that are new to the series: two kinds of money, police who remember your car and clothes, a mailbox that holds your pay, and stolen cars you have to register before they’re yours. This guide explains each one in a few lines, in the order you meet them, and links to the full guide for every topic.
Quick version: learn the map index and the phone first → check the mailbox after every job → open a BuckMe account in Buck Me and bank your cash → after a chase, change your car and clothes as well as losing the stars → steal cars with no tracker and spend your free registration on one you like → save manually at the start of each chapter.
How the story is laid out
You play Lucia in the Prologue, then Jason for almost all of Chapter 1 in the Leonida Keys, starting with Gone Fishing. Chapter 2 moves to the Starlet Motel in Port Gellhorn with Lucia in the lead, and Chapter 3 takes the pair into Vice City. The mission list and the Chapter 1 hub show the order, and the characters guide covers who’s who. A normal story run is about 60 to 80 hours, according to our how long to beat guide.
There are no difficulty settings, no mission replay and no mission medals. If a mission goes wrong, the pause menu has Retry Checkpoint and Restart Mission.
Controls basics
Button names below are PS5, as shown in the footage we used. On Xbox, L1/R1 are LB/RB and L2/R2 are LT/RT.
| Action | PS5 |
|---|---|
| Pause menu and map | Touchpad |
| Phone | D-pad up |
| Weapon wheel (loadout) | Hold L1, R1 switches Weapons and Items |
| Fight, block, dodge | Square, hold Cross, press Cross |
| Switch character (Chapter 2 on) | Hold d-pad right, then R1 |
| Set map destination, add marker | X, Square |
Prompts change with context, so read the corner of the screen when you walk up to people, cars and shops. The combat tips cover aiming and cover, and every tutorial pop-up is saved in the pause menu’s Help section if you miss one.
The HUD
The bars in the top-left are health (heart), stamina (lightning bolt) and focus (eye, purple). Your wanted stars sit in the top-right, with three small red icons under them for what the police know: your clothing, your appearance and your vehicle. Your ammo shows below them when you’re armed. The minimap and GPS route are bottom-left, hints appear top-left and the current objective is written along the bottom of the screen.
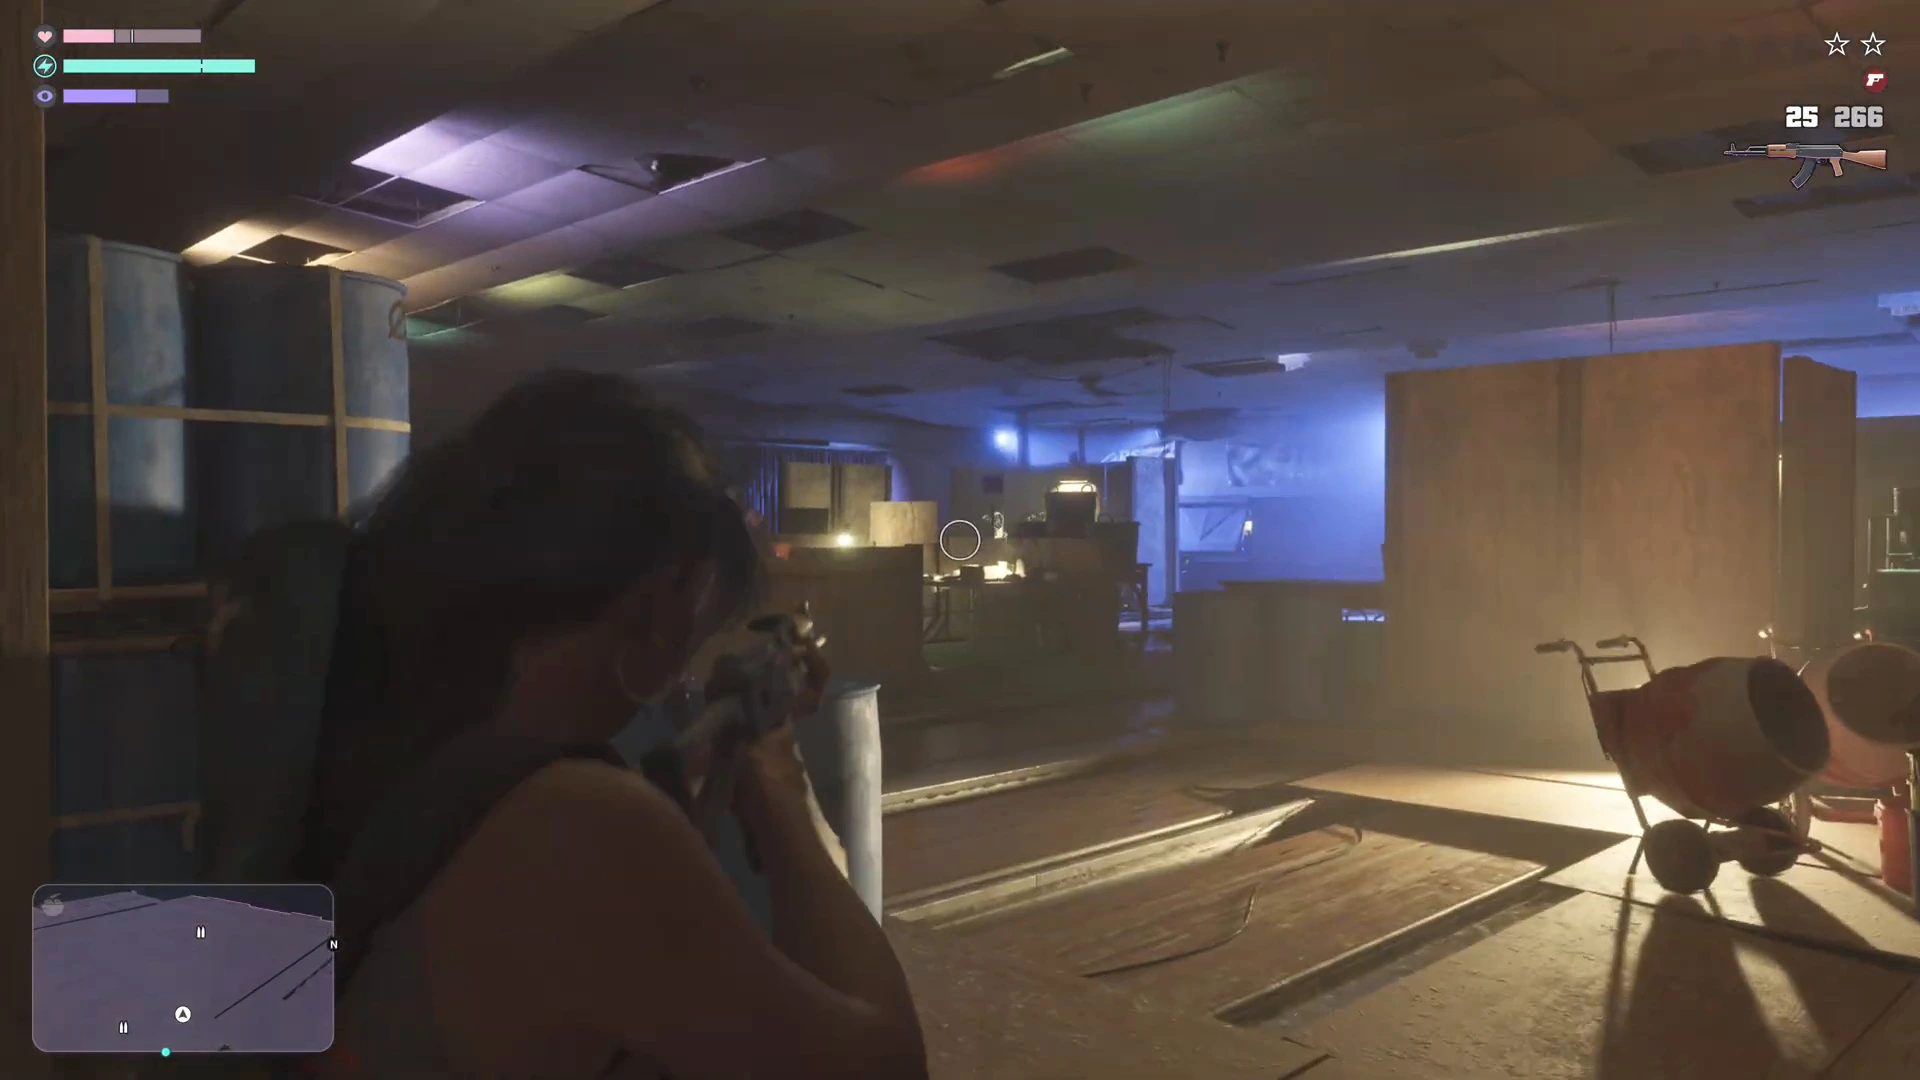
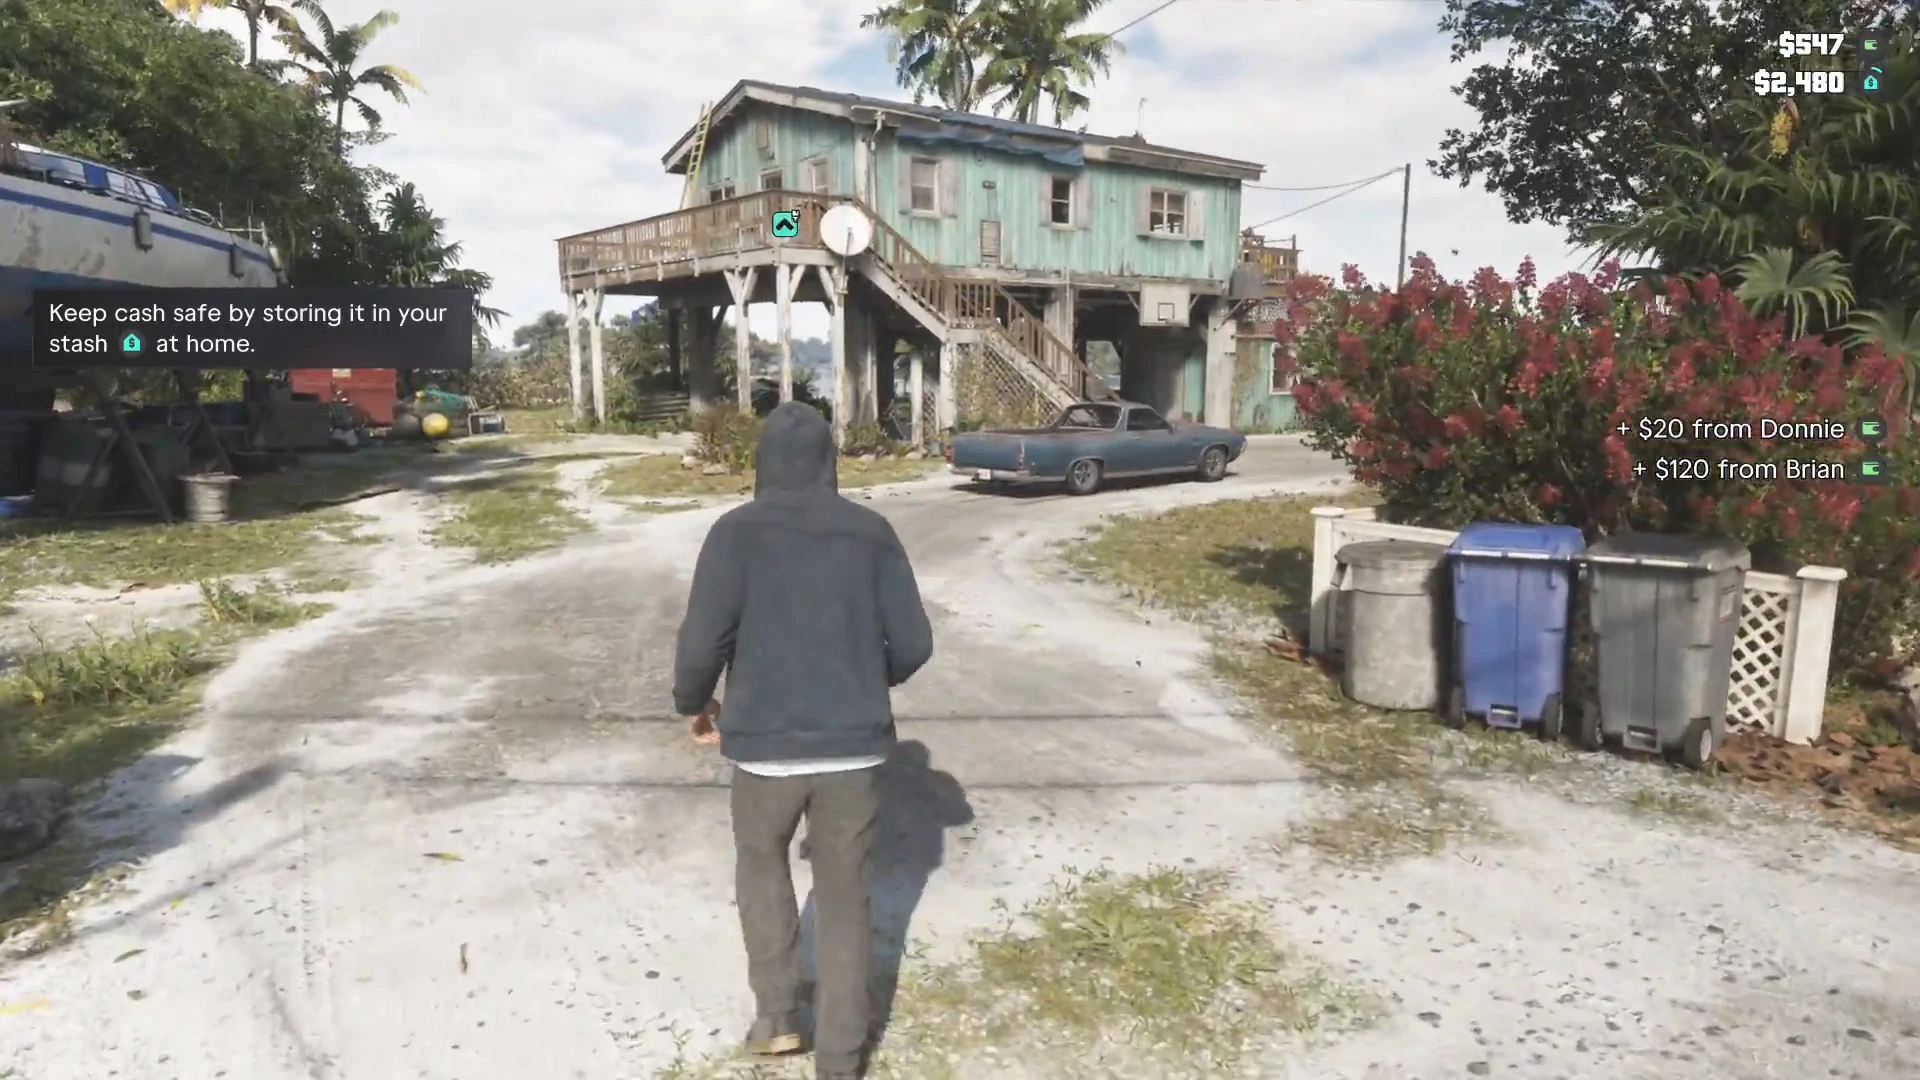
Money appears top-right when it changes or when you open a menu. The green wallet line is cash you’re carrying and the purple b line is your BuckMe bank balance. A third line with a house icon also shows up. It uses the same icon as the game’s hint about keeping cash in your stash at home. When the stars turn grey, the police have lost sight of you.
The phone
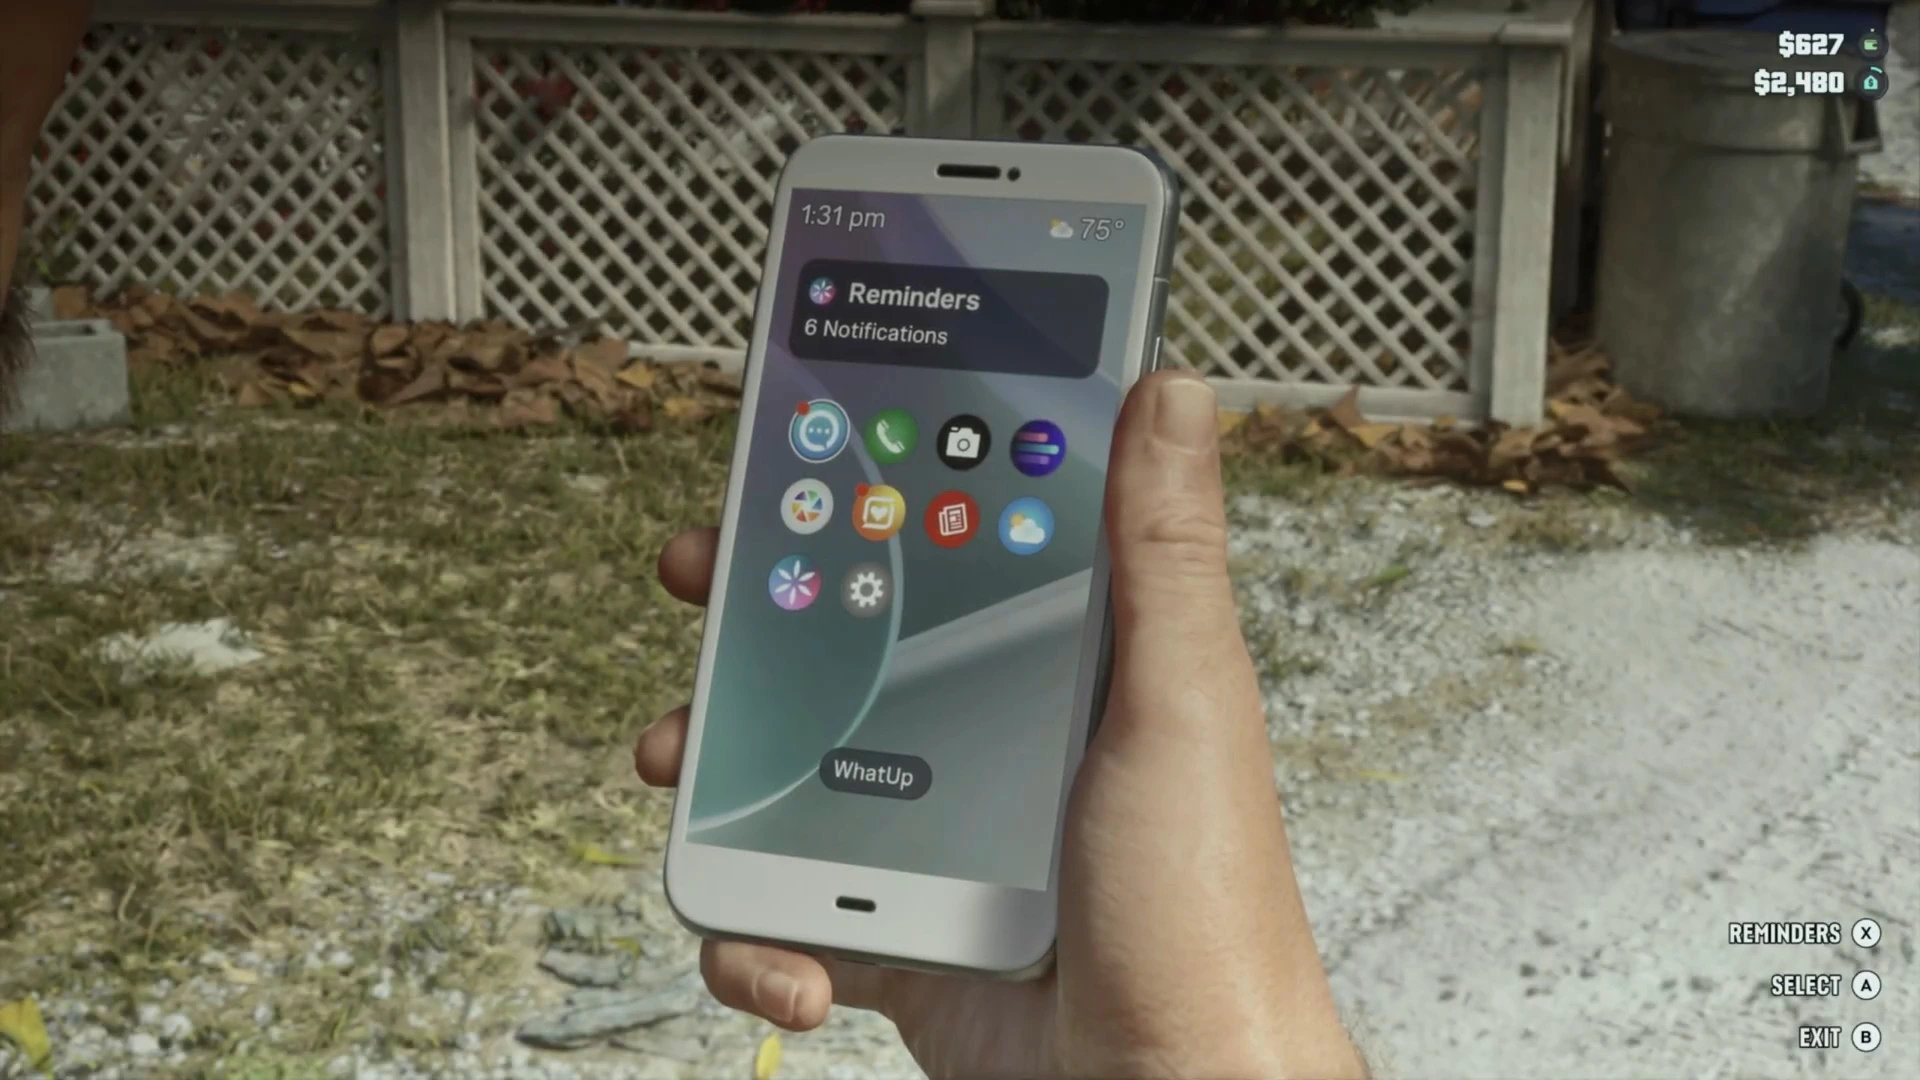
Press d-pad up to bring out the phone. Early on it has contacts, messages, a camera and a few system apps, and it fills up as the story hands you more: BuckMe for banking, the cop scanner from Cal in Unwanted Attention, WAiNK for scanning cars, Scooter Bros for your registered cars, a Fitness app and the RydeMe ride app. Contacts include Paradise Taxi, which is how you fast travel (see fast travel), and Joey, who delivers Jason’s car. The things you missed guide lists more phone details.
The map and the index
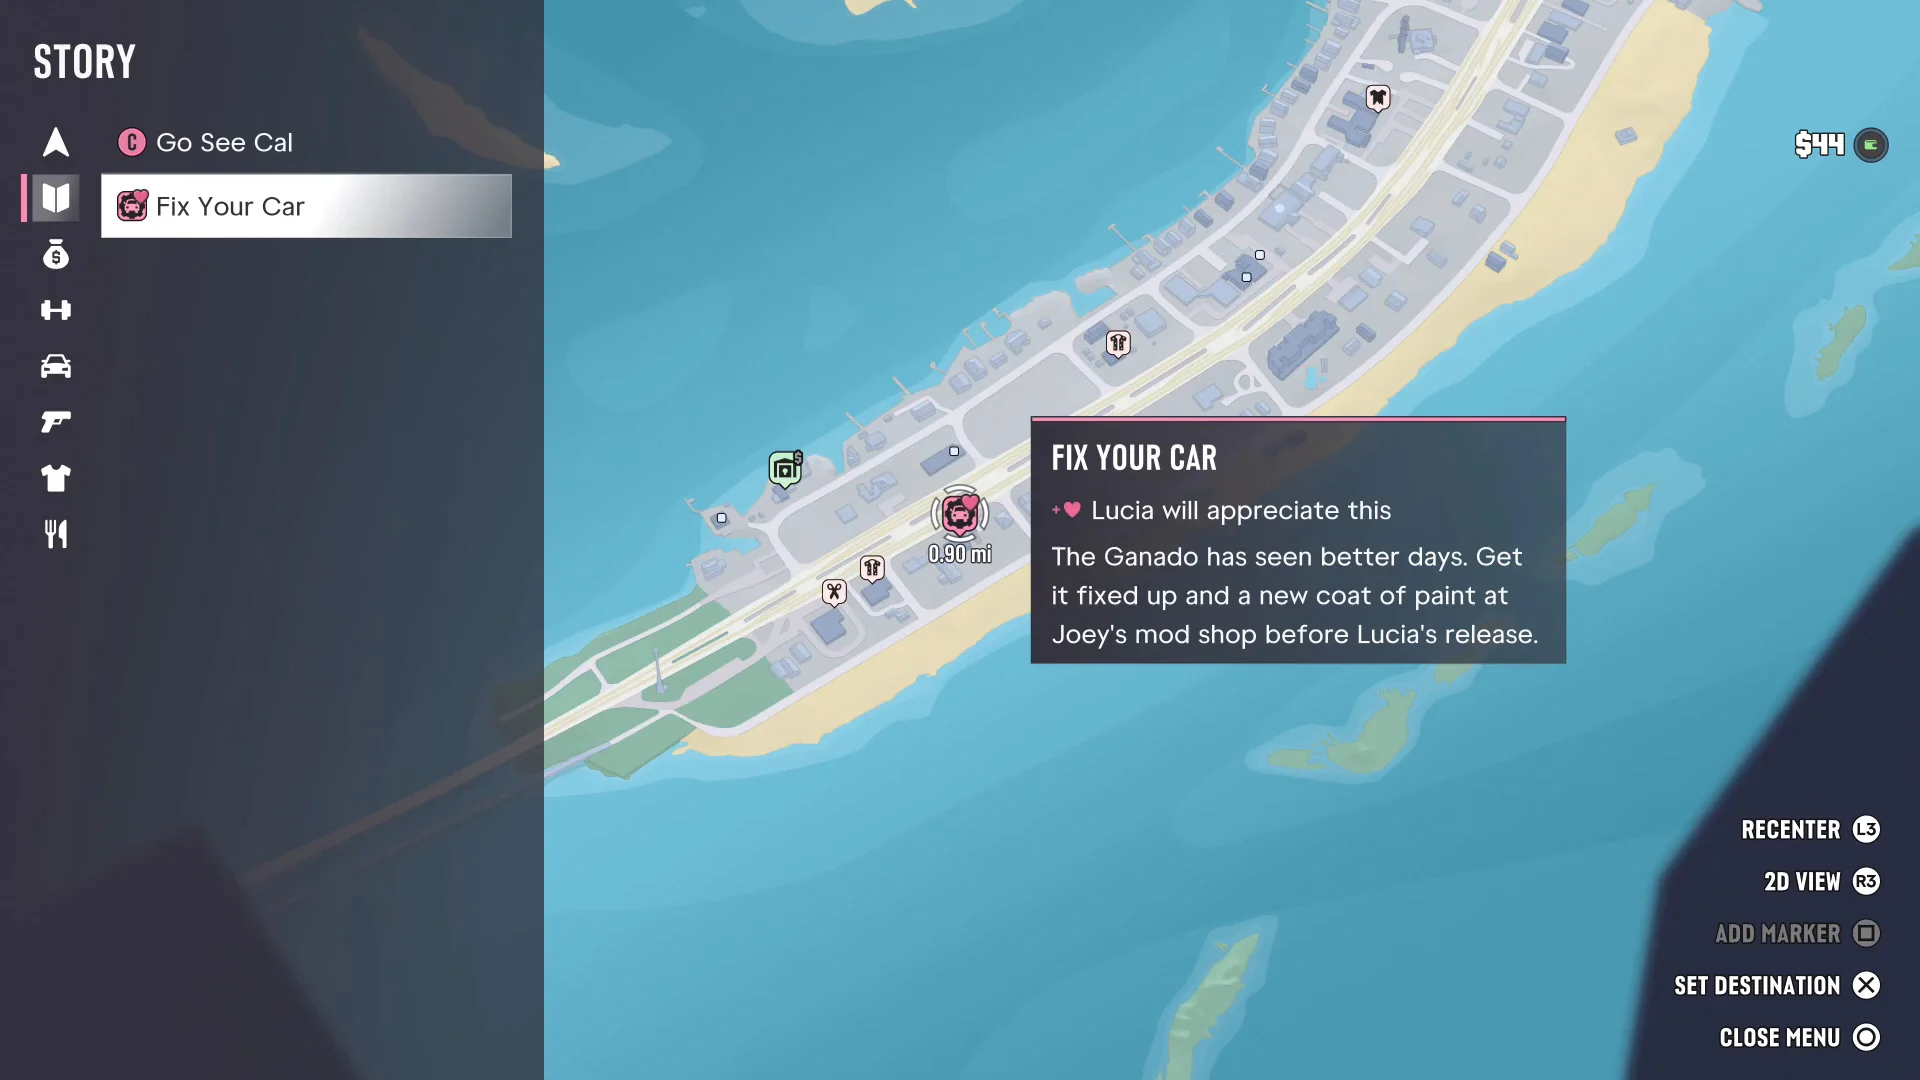
Open the pause menu and go to the Map tab. Move the cursor and press X to set a destination, and the GPS line appears on the minimap. Press the d-pad on the map to open the index, a list on the left with tabs for your personal vehicles and home, your story missions with optional tasks underneath, robbery targets and drop-offs, and shop categories. If you don’t know what to do next, the Story tab tells you. Hold the d-pad to show nearby places instead of scrolling.
Full controls are in how to use the map, index and GPS, and the regions are in the GTA 6 map guide.
Switching characters
For the first few hours the story picks who you play. Free switching opens in Chapter 2 once Breakfast Run and Coffee Break are done, and from then on you hold the d-pad and press the shoulder button shown on screen. A greyed-out portrait means the other character is busy in a scene or a one-character mission. See how to switch characters.
Money: cash, the mailbox and BuckMe
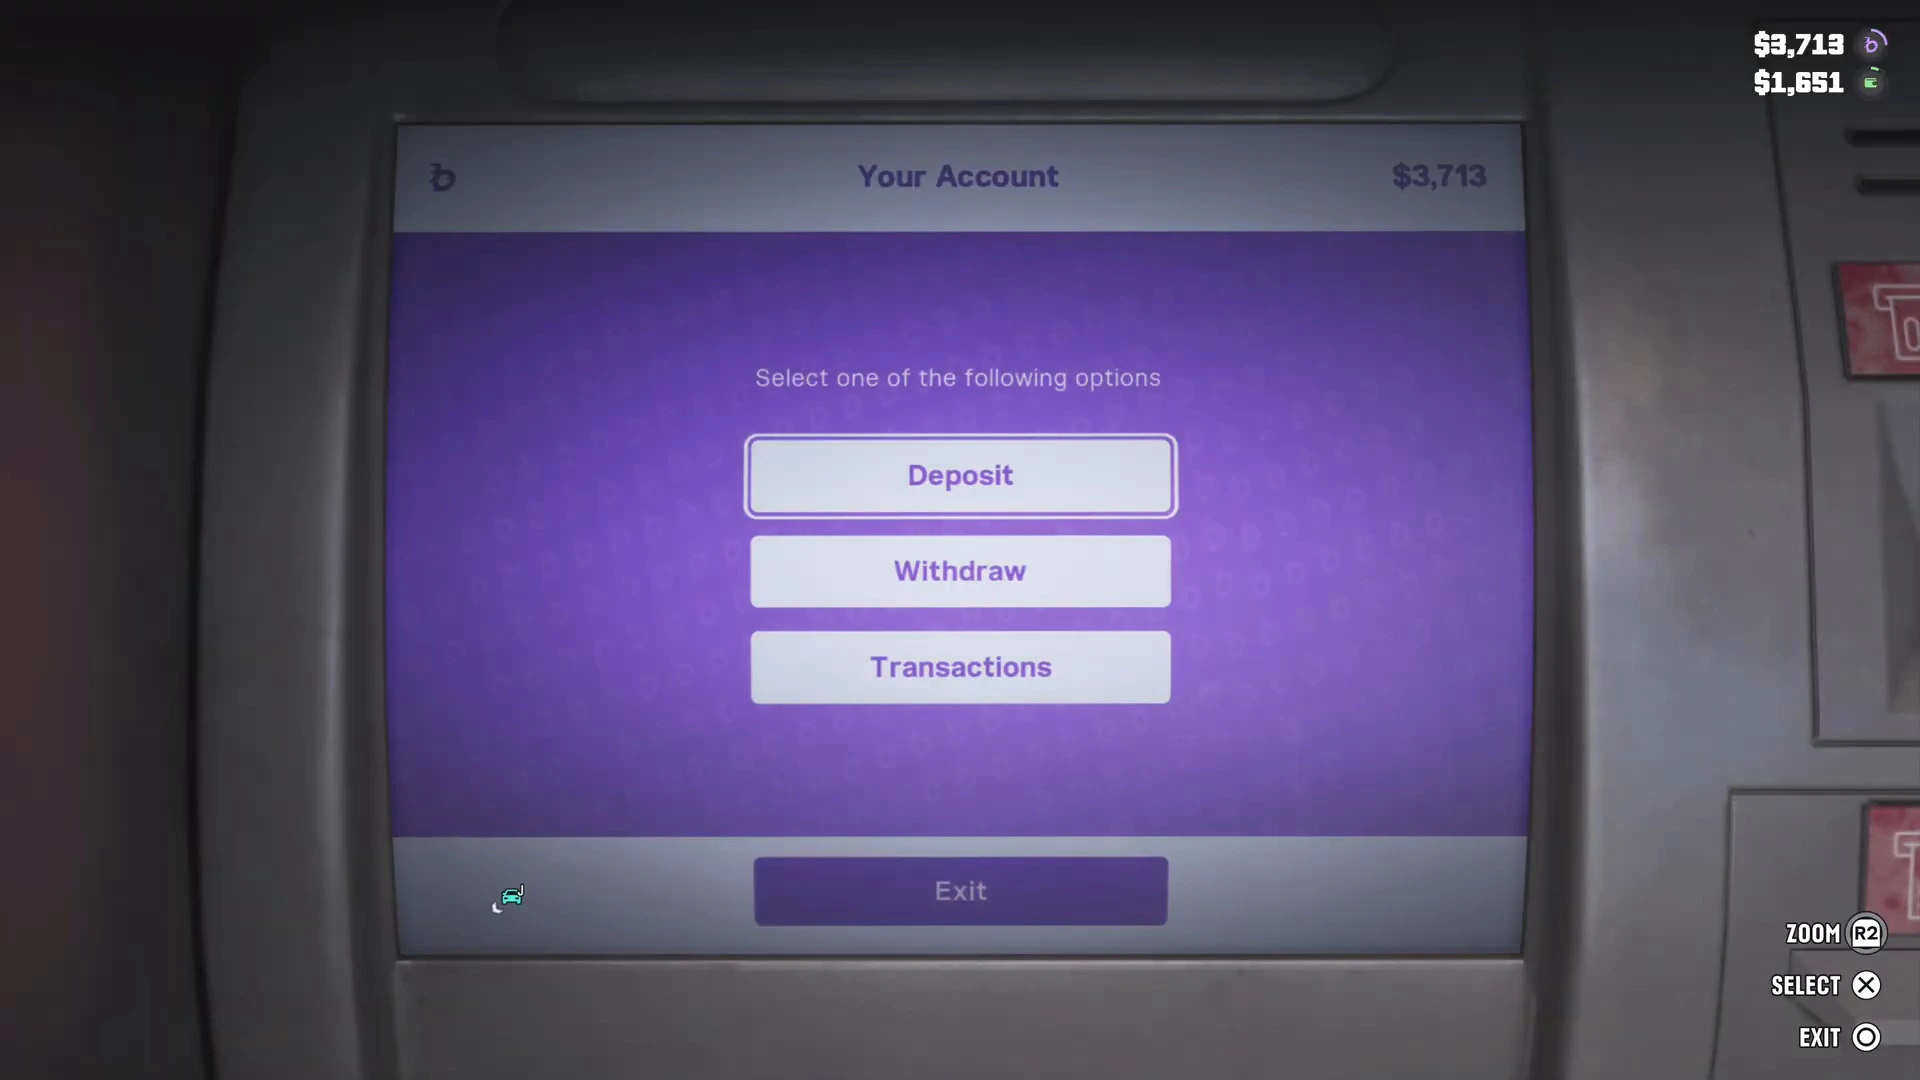
GTA 6 splits money in two. Cash is what you carry and what most early jobs pay. BuckMe is your bank account, and anything that costs about $1,000 or more, such as the bigger guns and engine Stage 2, is paid from it. Jason has no account until Buck Me, which gives a $100 welcome bonus and unlocks ATMs.
Story pay from Brian, Cal and Donnie doesn’t go into your pocket. It waits in the mailbox outside Jason’s house: $20 from Donnie and $120 from Brian after Gone Fishing. Check it between jobs.
To bank cash, open BuckMe, choose ATM Finder and drive to the marked machine. Each account holds up to $15,000, and Family Savings has its own goals. See how to deposit cash at an ATM, Save for the Future and the money guide for where early money comes from.
Saving and safehouses
Saving isn’t tied to a bed. Pause, go to Game and choose Save Game while you’re in free roam. PowerPyx reports 15 manual slots and one autosave. Because there’s no mission replay, keep a manual save at the start of every chapter.
Your Chapter 1 home is Jason’s house on Key Lento, with a wardrobe, a fridge, a bed, a hidden cash stash and weights on the deck. Chapter 2 moves you to the Starlet Motel, where the manager wants rent. Jason’s house is lost at the end of Chapter 1, so don’t leave money in its stash. The safehouses guide covers both homes and the garages you can buy later.
Heat and wanted levels
Losing the stars is only half the job. First get out of the red search area on the map, or hide inside it behind tall cover until the police radio goes quiet. Then deal with heat: respray the car at a Pay ‘n’ Spray (unlocked in Unwanted Attention), take your hat or glasses on or off, and buy a new outfit, which the shop says “will remove outfit heat.” Some missions won’t start until you see Heat cleared. The step-by-step version is how to lose the cops.
Health, healing and adrenaline
Hiding until your health comes back is slow, and mid-fight you rarely have time. Donnie gives you Zombix in Gone Fishing, your first healing item, and you use it from the bottom of the weapon wheel. Adrenaline boosts health, stamina and focus for a short time, so save it for a bad moment. Food and drinks give short buffs too: a fridge smoothie at the motel buffed stamina and focus. Working out raises your maximum health and stamina over time, as the gym guide explains.
Cars: stealing, registering and Joey’s tow
Walk up to a parked car to break in. Locked cars need hotwiring, alarms draw attention, and some newer cars are keyless and can’t be started without a key cloner. From the Moses mission in Chapter 2, the WAiNK app shows a car’s access, security, tracker, sell value and cost to register before you touch it, and Lucia gets a Slim Jim to open alarmed cars quietly. See how to steal cars.
To make a stolen car yours, take it to Moses at Watkins Auto Parts, respray it and choose Register. The first registration is free, and every one after that costs the amount on the car’s card. See how to register a car.
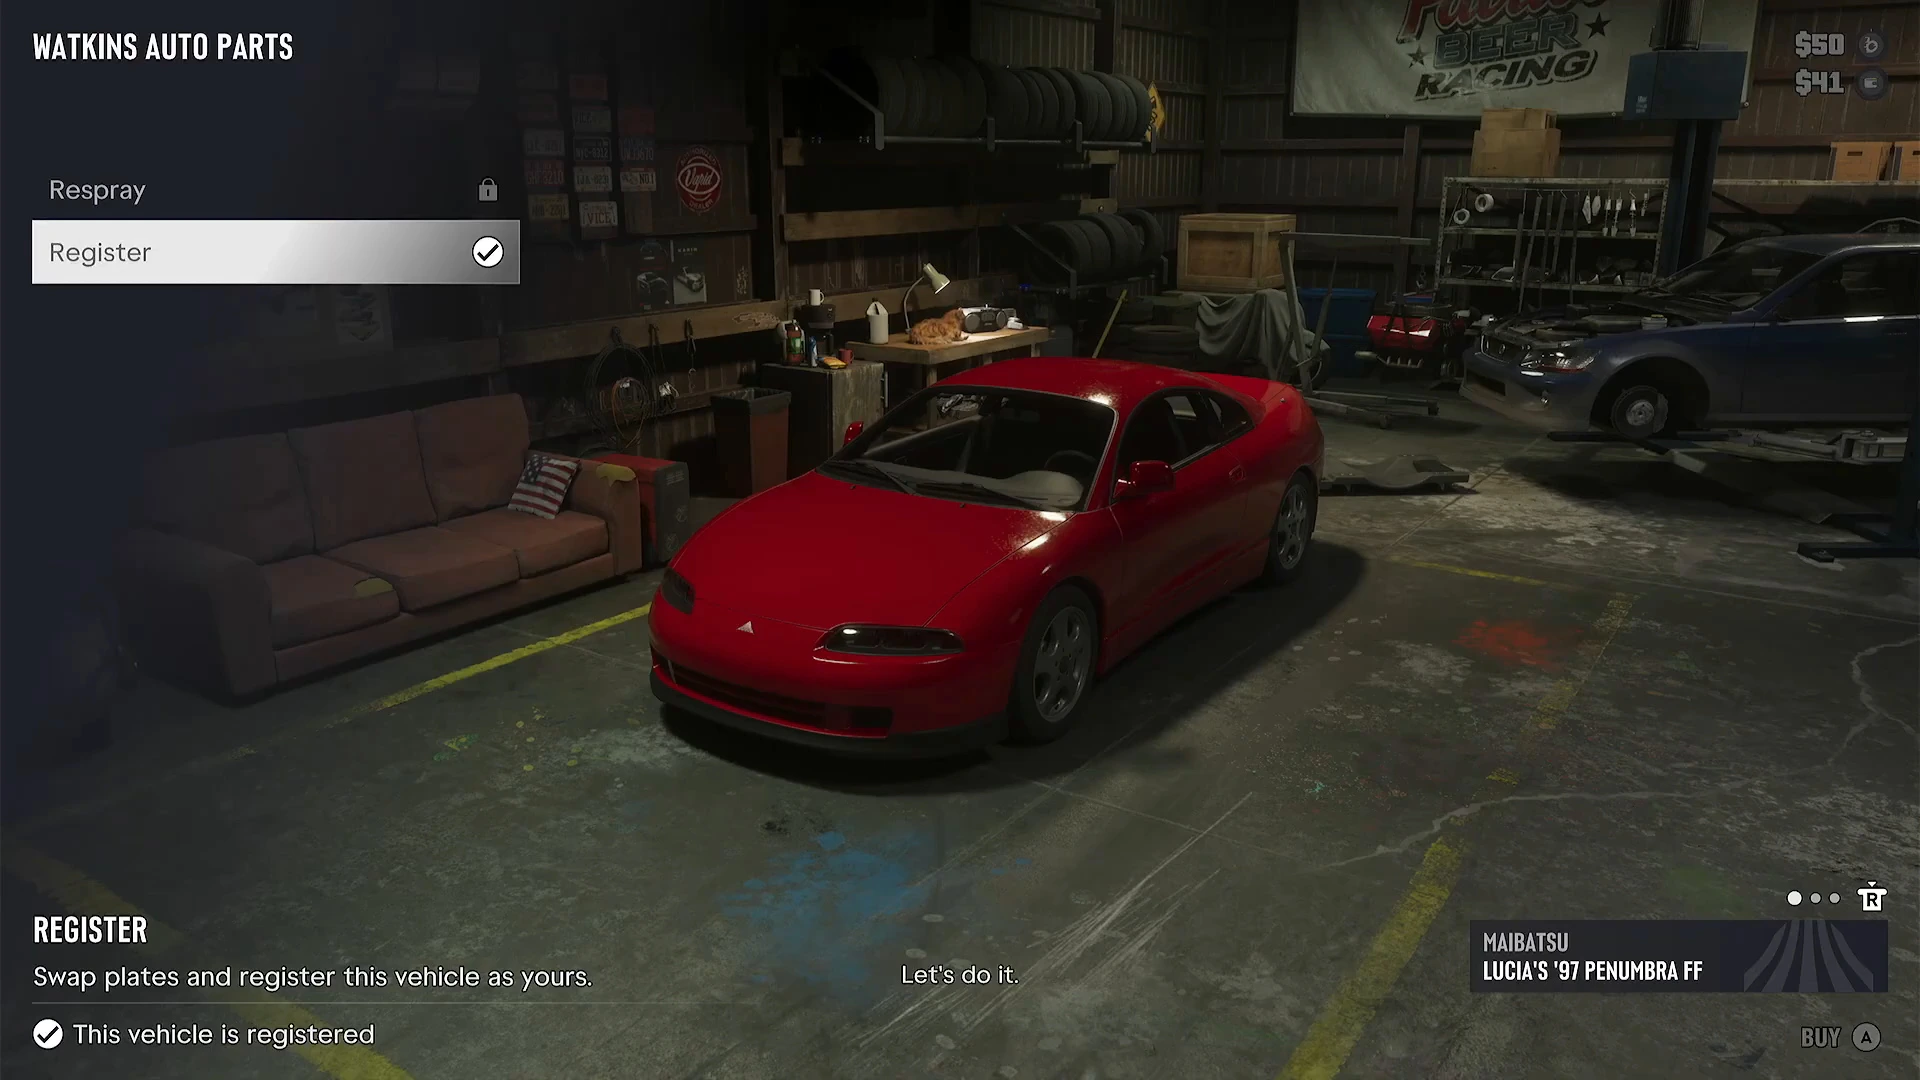
Jason doesn’t need to register anything in Chapter 1. After Just a Scratch, phone Joey from your contacts and his garage delivers the Ganado to you, repaired, on Brian’s account. Lucia’s version is the Scooter Bros app. Both are in how to get your car back.
Guns and shops
Your first gun store is Chuck’s Tackle & Shot in Key Lento, which you visit in Gear Up. You can carry two sidearms and two longarms, and the rest go in a weapon locker or your car’s trunk. Don’t walk around with a rifle out, because the game warns that openly carrying weapons draws attention. See where to buy guns and the best early weapons.
Leonida also has barbers, clothing stores, tattoo parlors, mod shops and Pay ‘n’ Sprays. Everything is marked on the map once you’ve cleared the fog in that area. The shops and services guide has the counts and what each sells, and mod shops and upgrades covers car parts.
What you can skip early on
You don’t have to do everything the moment it appears. These are safe to leave for later:
- Paid resprays and cosmetic parts. Joey’s first respray in Just a Scratch is free, and cosmetics don’t help you win anything.
- The house repairs. The jobs in Jason’s House are cosmetic and pay no cash, though a hint says they build your relationship with Lucia.
- Paying to skip every taxi ride. Skip Journey costs $100 on top of the fare. Drive short trips yourself.
- Your criminal profile. The game tracks how you fight, but how much it matters long-term isn’t confirmed yet. Play the way you like. The combat tips explain the profiles.
- Cheats. They don’t unlock until you finish the story. See the cheats guide.
Where to go next
Once these systems make sense, follow the first-session checklist to put them in order, then move on to the intermediate guide for money routes, mod-shop priorities and combat once you reach Chapter 2.
More GTA 6 guides
- GTA 6 controls
- GTA 6 best settings
- GTA 6 FAQ
- GTA 6 tips nobody tells you
- GTA 6 vs GTA 5: the biggest differences
- GTA 6 money mistakes to avoid
- What to buy first in GTA 6
- Every GTA 6 mission walkthrough